































Step-by-step guide
Set up your live photo wall, step by step
Every screen you'll see, in order, from creating your free account to sharing the album after the party. About 20 minutes from start to finish.
Before the event
About 15 minutes, any day before
- 1 min
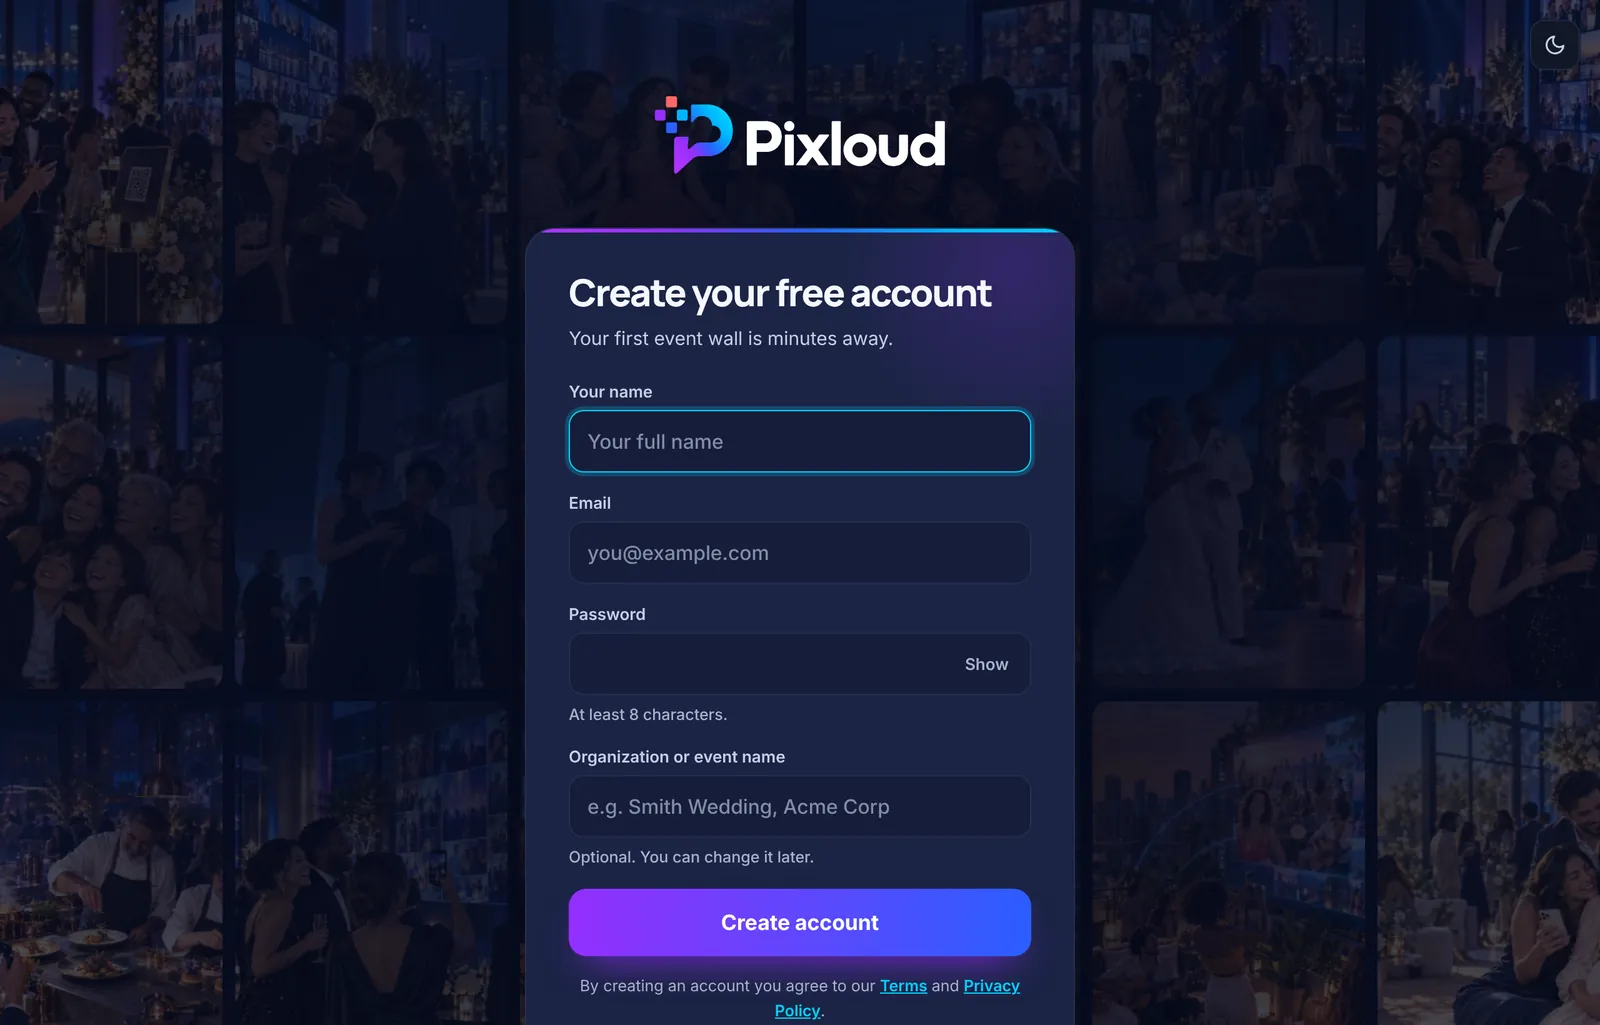
Step 1: Create your free account
Go to pixloud.app and click Start free. Type your name, email and a password. The organisation name is optional: most couples use something like "Sarah & James Wedding". No card needed.
TipUse an email you check often. That's where reminders and your download link go.
- 2 min
Step 2: Create your event
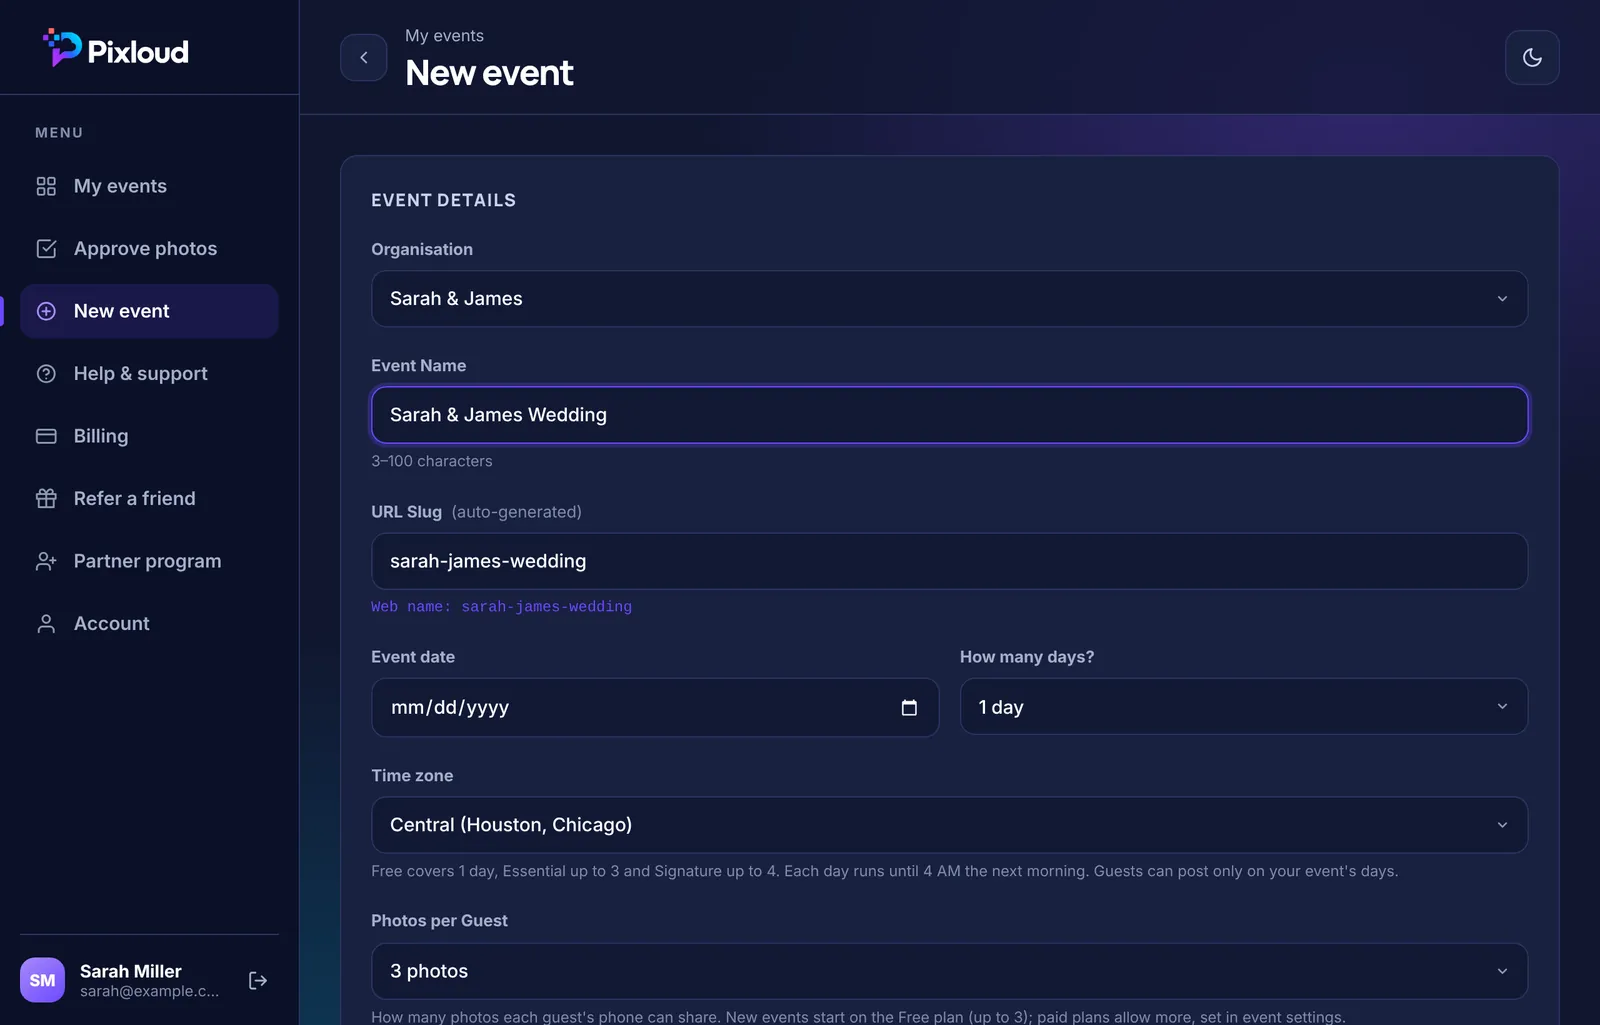
Click New event. Give it the name guests will see on their phones, pick the date, how many days it runs and your time zone. Then choose how many photos each guest can send.
TipName it the way guests know you: "Sarah & James" works better than "Miller-Lopez Wedding 2026".
TipEach event day runs until 4 AM the next morning, so late parties are covered.
- 1 min
Step 3: Pick a wall style
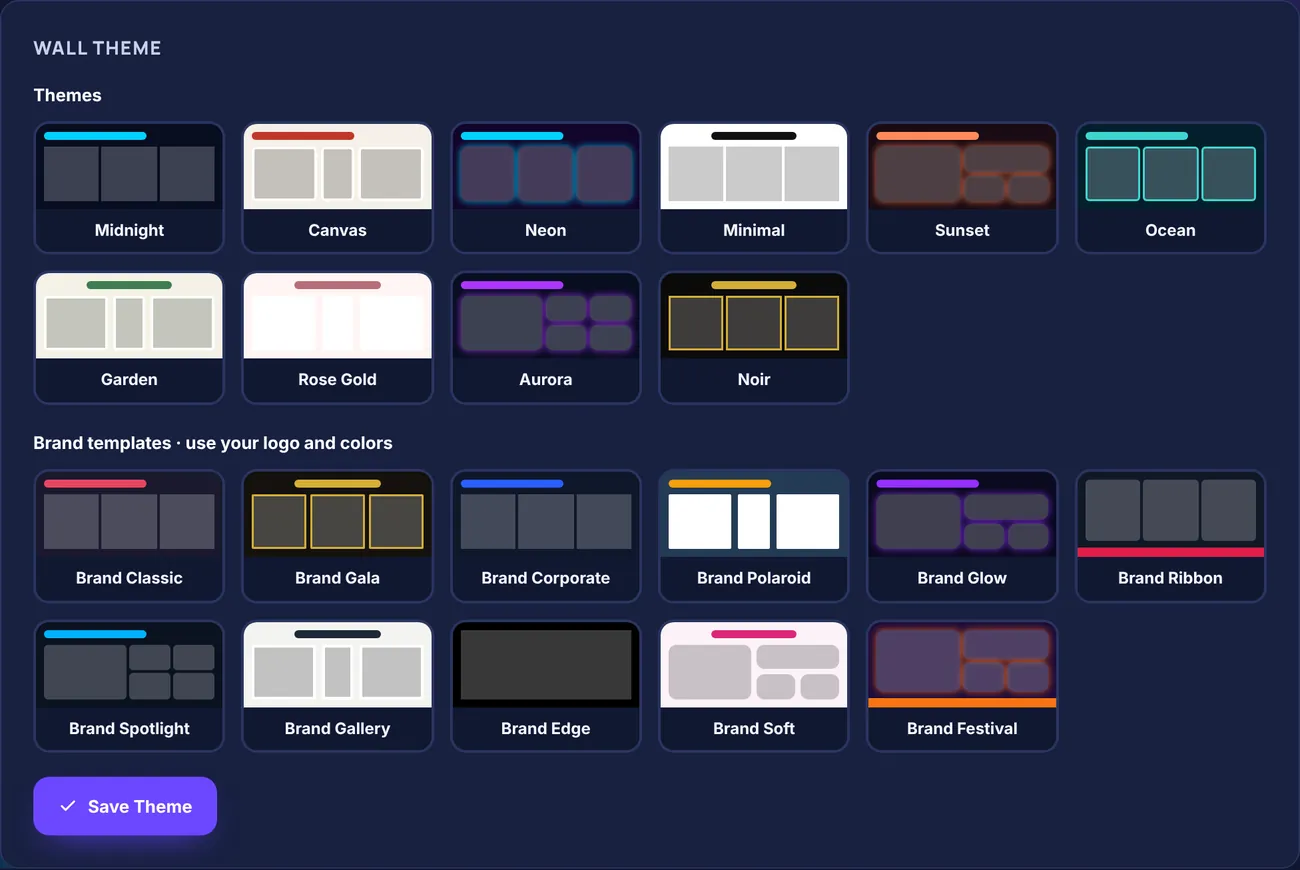
Choose one of the ten wall themes, or a brand template that uses your own logo and colours. You can change the style any time, even in the middle of the party, and the screens update by themselves.
TipMatch the theme to your colours: Rose Gold and Garden suit most weddings, Neon and Aurora suit parties.
- 1 min
Step 4: Choose what guests can share
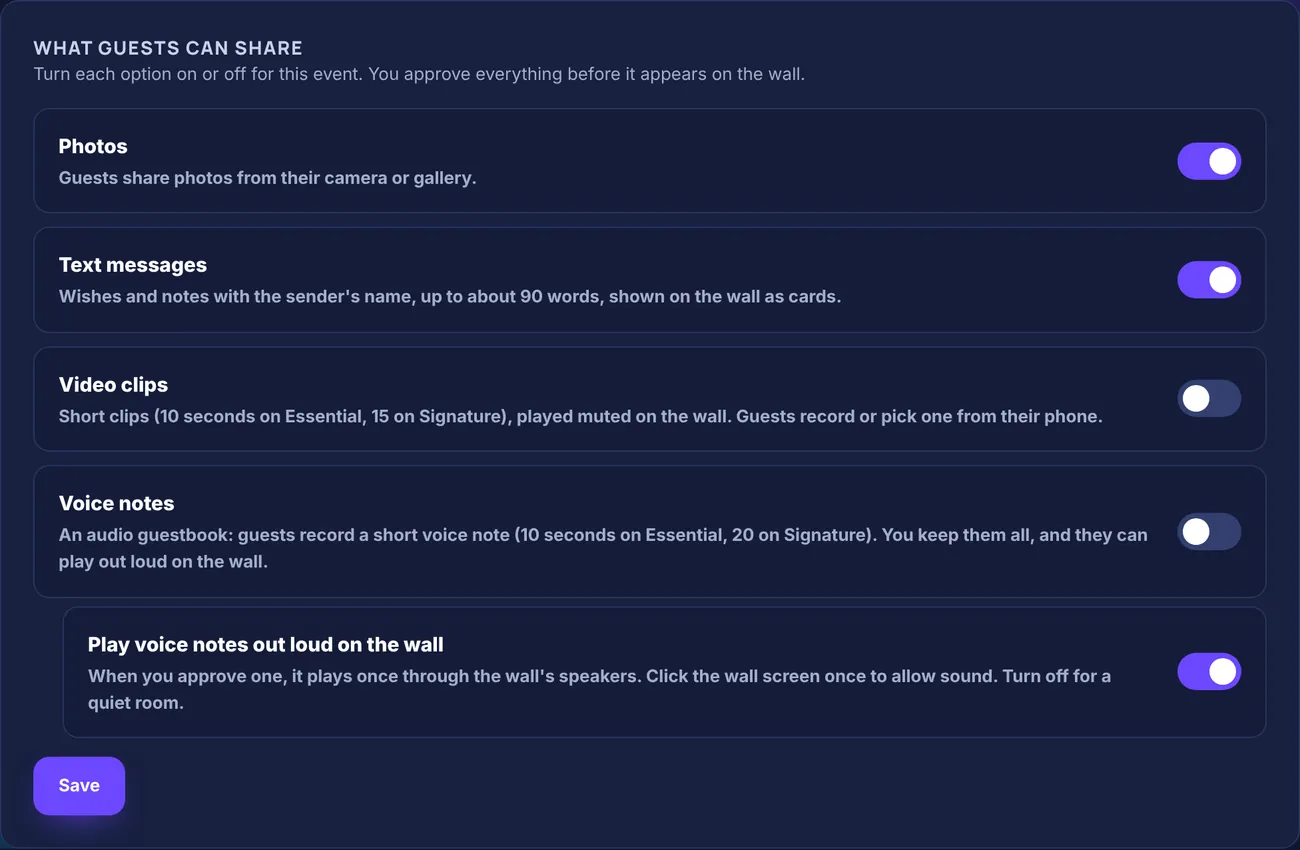
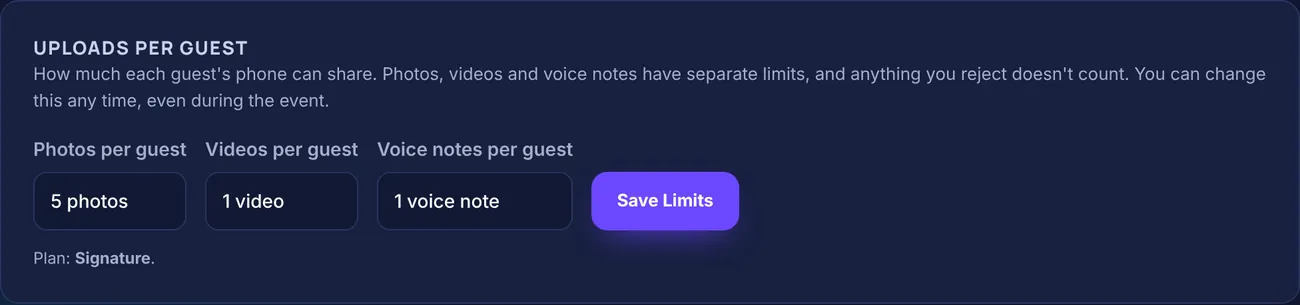
Open your event and go to the Guests tab. Turn on what you want: photos and text messages work on every plan; short video clips and voice notes come with Essential and Signature. Below that, set how many each phone can send.
TipVoice notes are wonderful at weddings: grandparents who'd never take the microphone happily record a message.
- 3 min
Step 5: Print your QR code
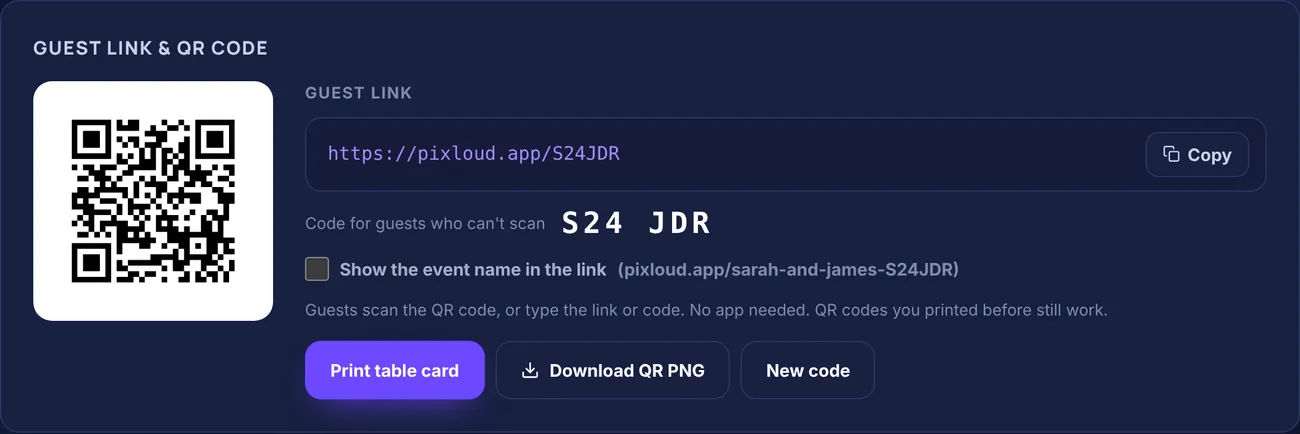
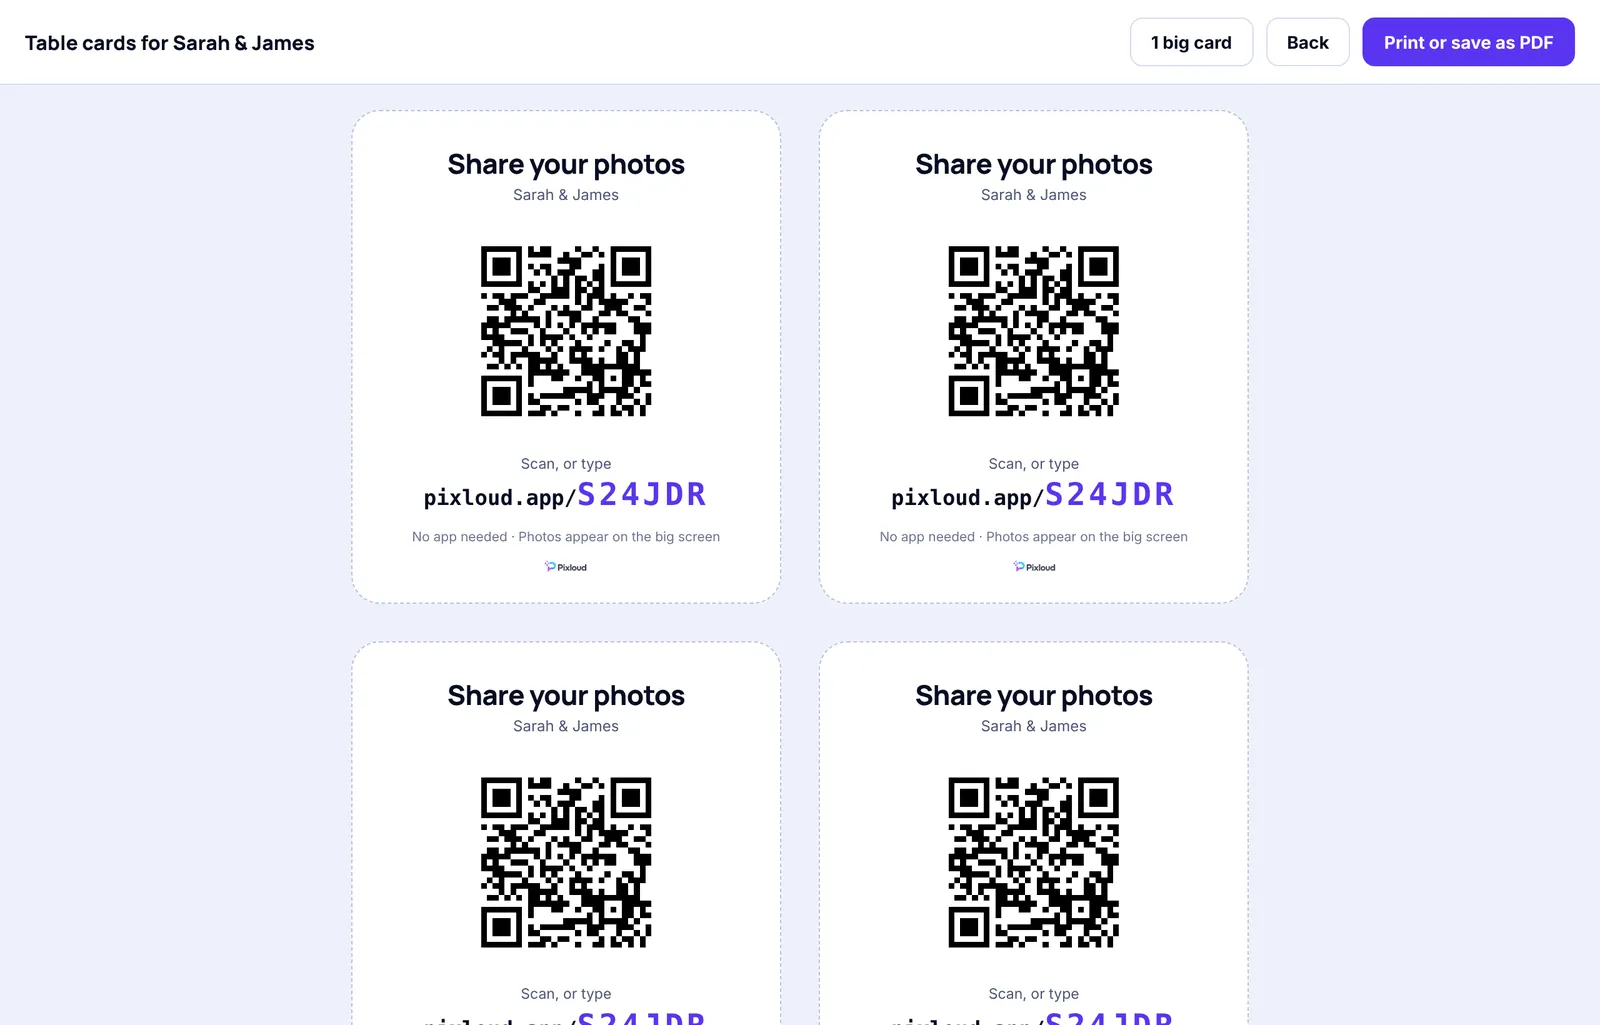
On the Overview tab, find Guest link & QR code and click Print table card. You get four cards to a page, ready for your printer or a print shop, or switch to one big card for a sign. Download QR PNG gives you the code for slides, menus and programs.
TipPrint one card per table, plus one at the bar and one by the dessert table.
TipGuests who can't scan can type the short code on the card at pixloud.app/join.
- 2 min
Step 6: Invite helpers to approve photos
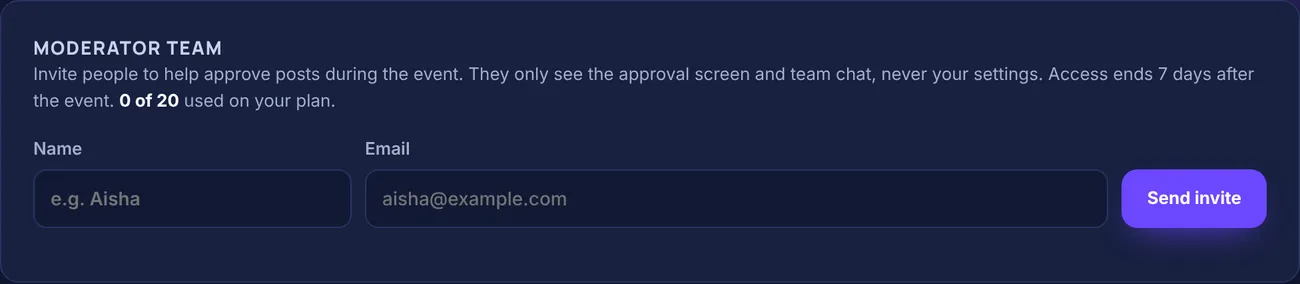
On the Team tab, add the name and email of anyone who'll approve photos: a friend, a sibling, your planner. They approve from their own phones and only ever see the approval screen and team chat, never your settings or billing.
TipTwo helpers taking one-hour shifts is plenty for most weddings.
Put the wall on a screen
About 5 minutes, at the venue
- 1 min
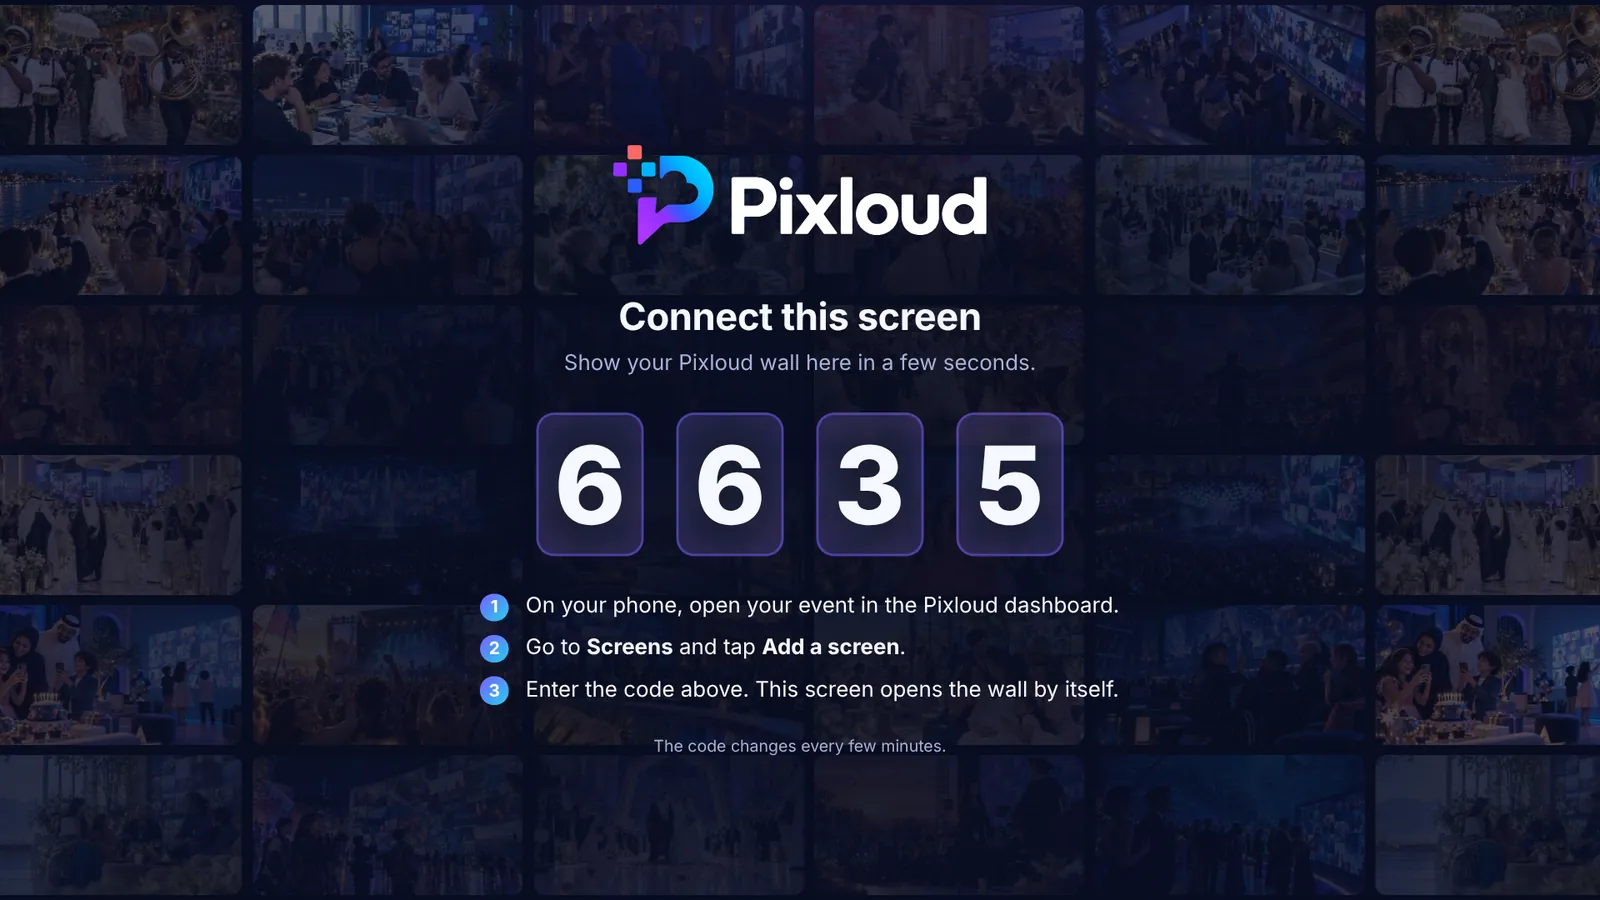
Step 7: Open pixloud.app/tv on the TV
On the TV or projector computer, open the web browser and go to pixloud.app/tv. A 4-digit code appears. On an Amazon Fire TV, install the Pixloud app instead and it shows the same code.
TipNo browser on the TV? Open the wall in Chrome on a laptop and cast the tab, or connect the laptop with an HDMI cable.
- 1 min
Step 8: Add the screen from your phone
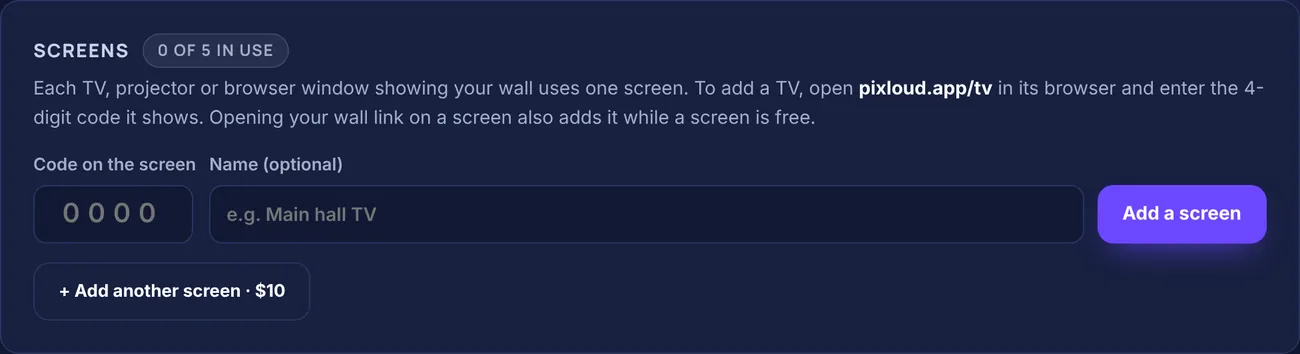
On your phone, open your event, scroll to Screens, type the 4-digit code and tap Add a screen. The TV switches to your wall by itself within a few seconds.
TipSignature includes up to 5 screens. Name each one ("Main hall", "Bar") so you know which is which.
- 2 min
Step 9: Send a test photo
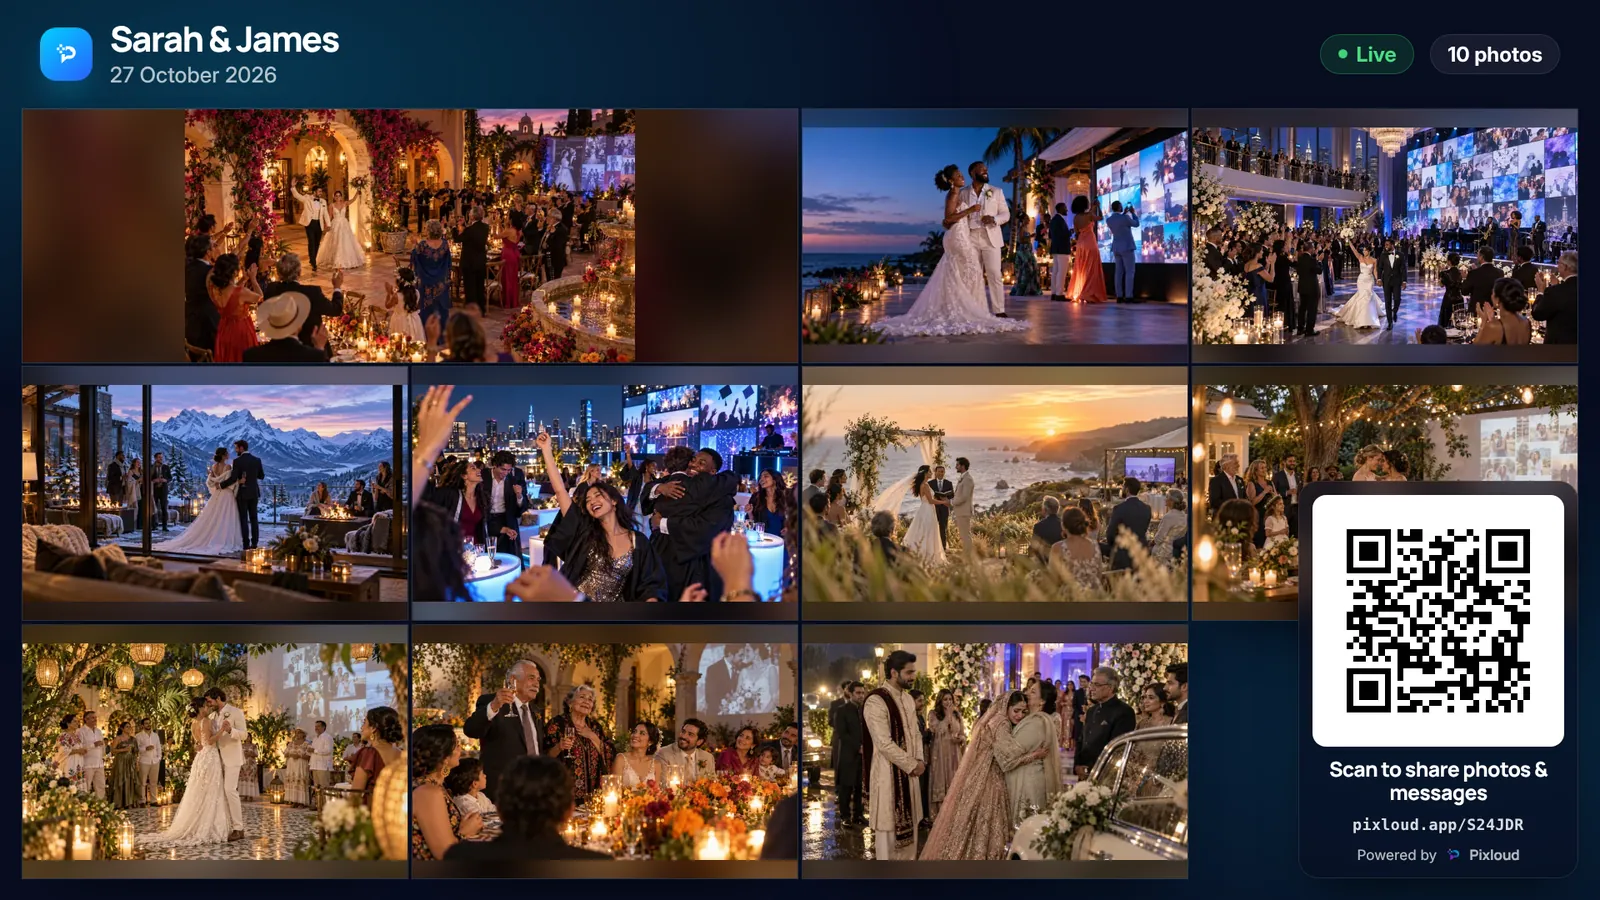
Scan your own table card, send a photo, and approve it. Watching it pop up on the TV is the best way to know everything works, and it means the wall isn't empty when the first guests arrive.
TipDo this the day before if you can, on the venue's actual screen.
On the night
Mostly hands-off
Step 10: Guests scan and share
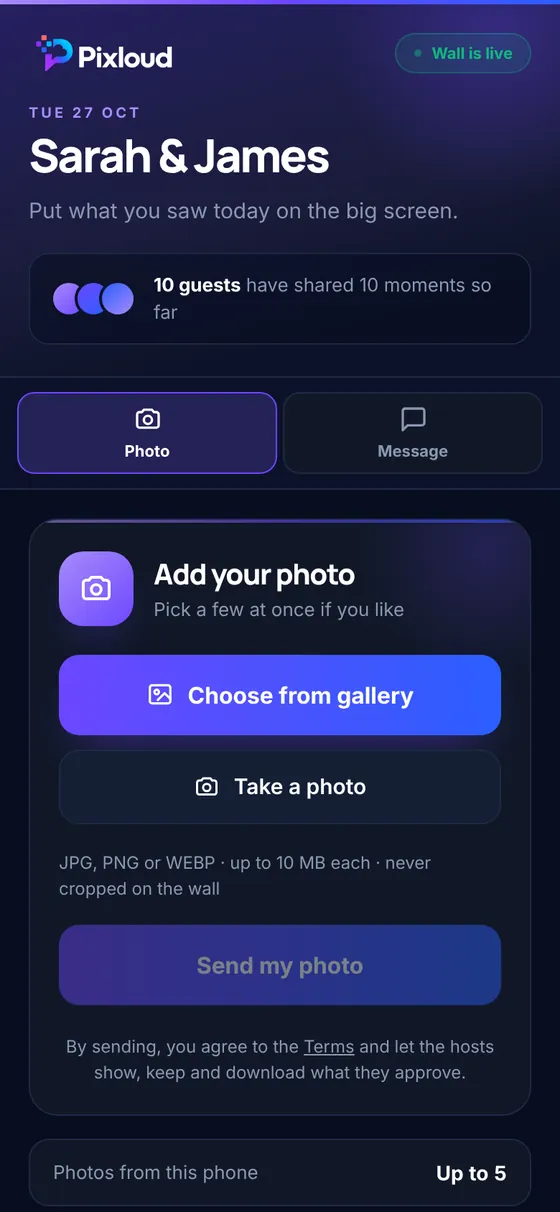
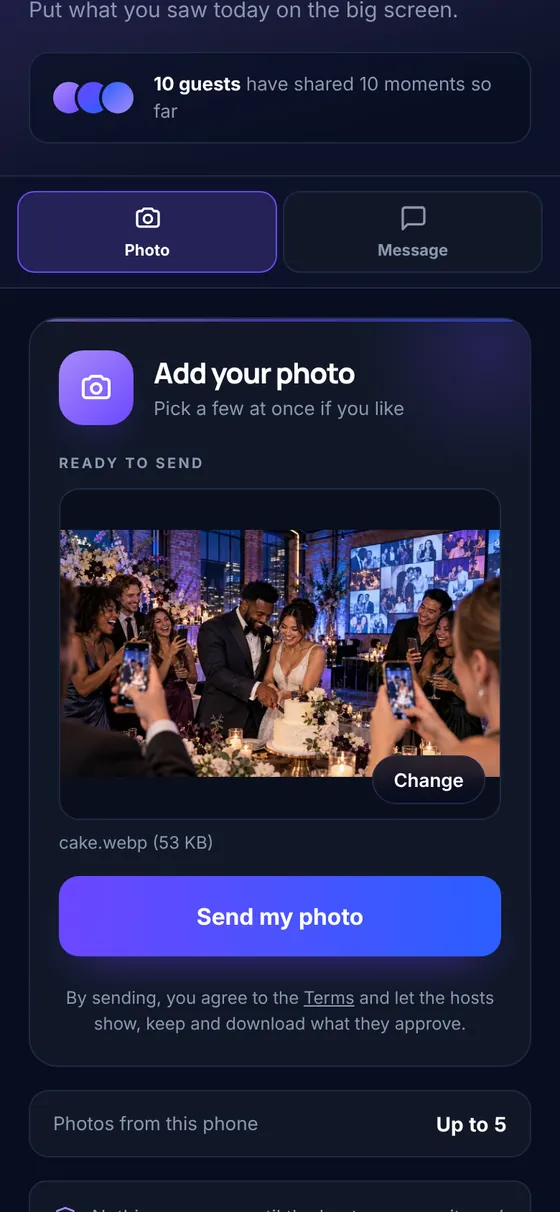
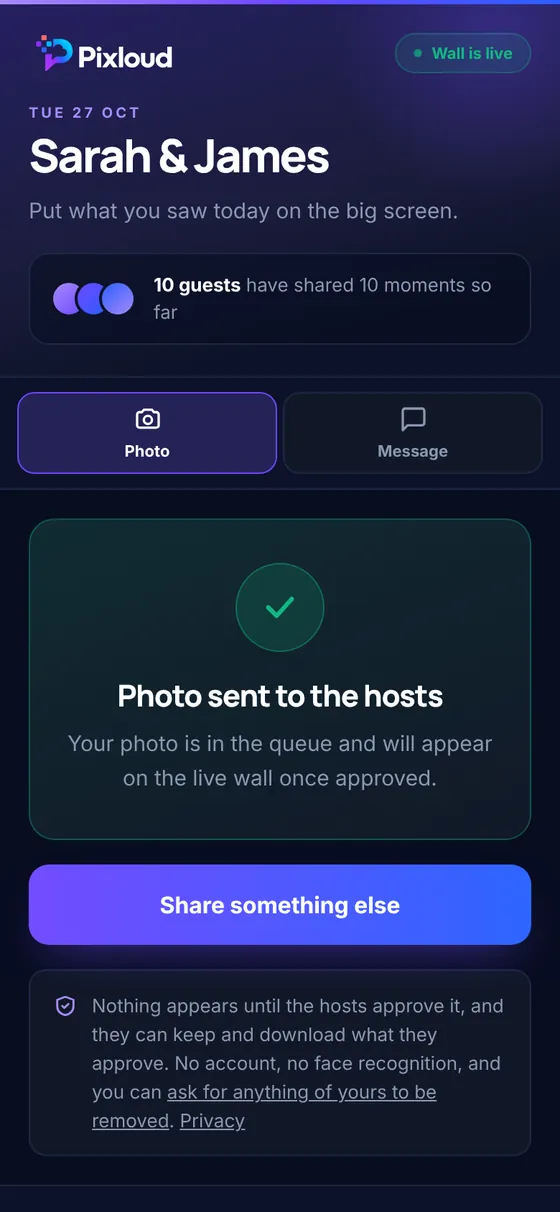
Guests point their phone camera at the QR code, and your event opens in their browser. They choose a photo, tap Send my photo, and see a confirmation. No app, no account, no email address.
TipAsk the DJ or MC to mention it once, right after dinner. That single announcement makes a big difference.
Step 11: Approve what goes up
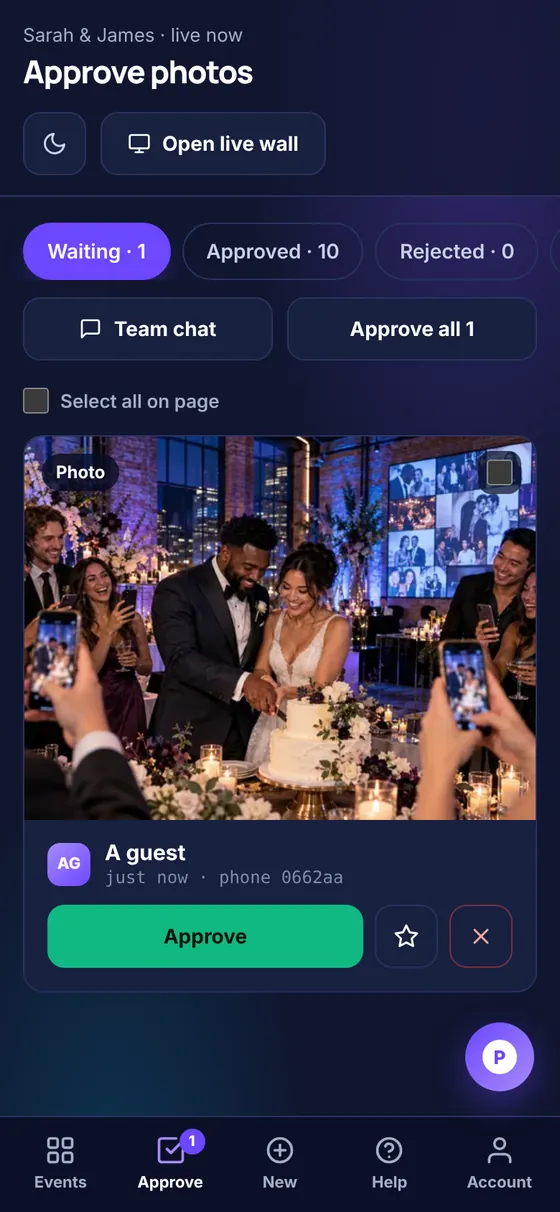
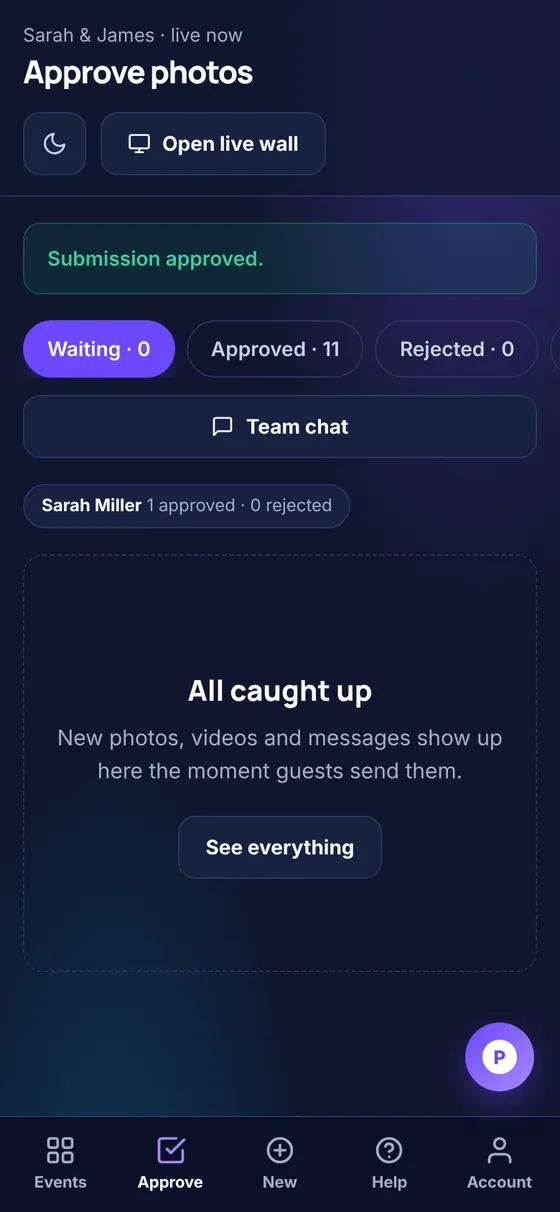
New photos wait in Approve photos. You or your helpers tap Approve to put a photo on the wall, or skip it with one tap. Nothing reaches the screen without approval, and guests never get a rude message about a skipped photo.
TipTap the star to feature a favourite: it shows bigger on the wall.
Step 12: Watch it go live
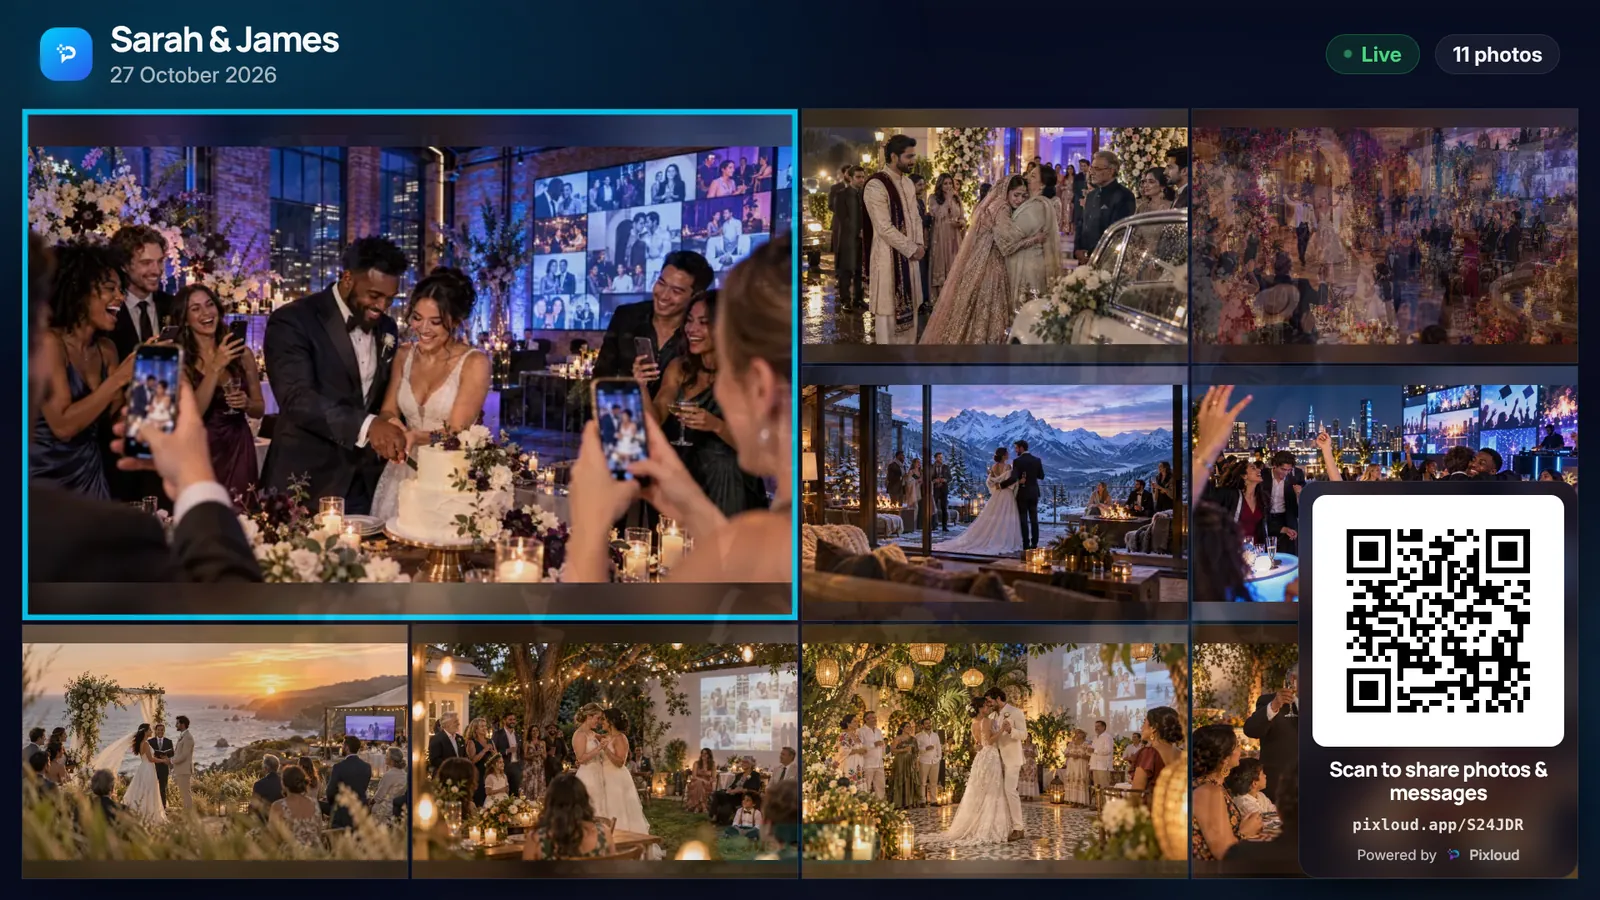
A few seconds after approval, the photo appears on the big screen with a "Just shared" moment, then joins the wall. The QR code stays in the corner so new guests can join all night.
After the event
About 5 minutes
- 5 min
Step 13: Share the album and download everything
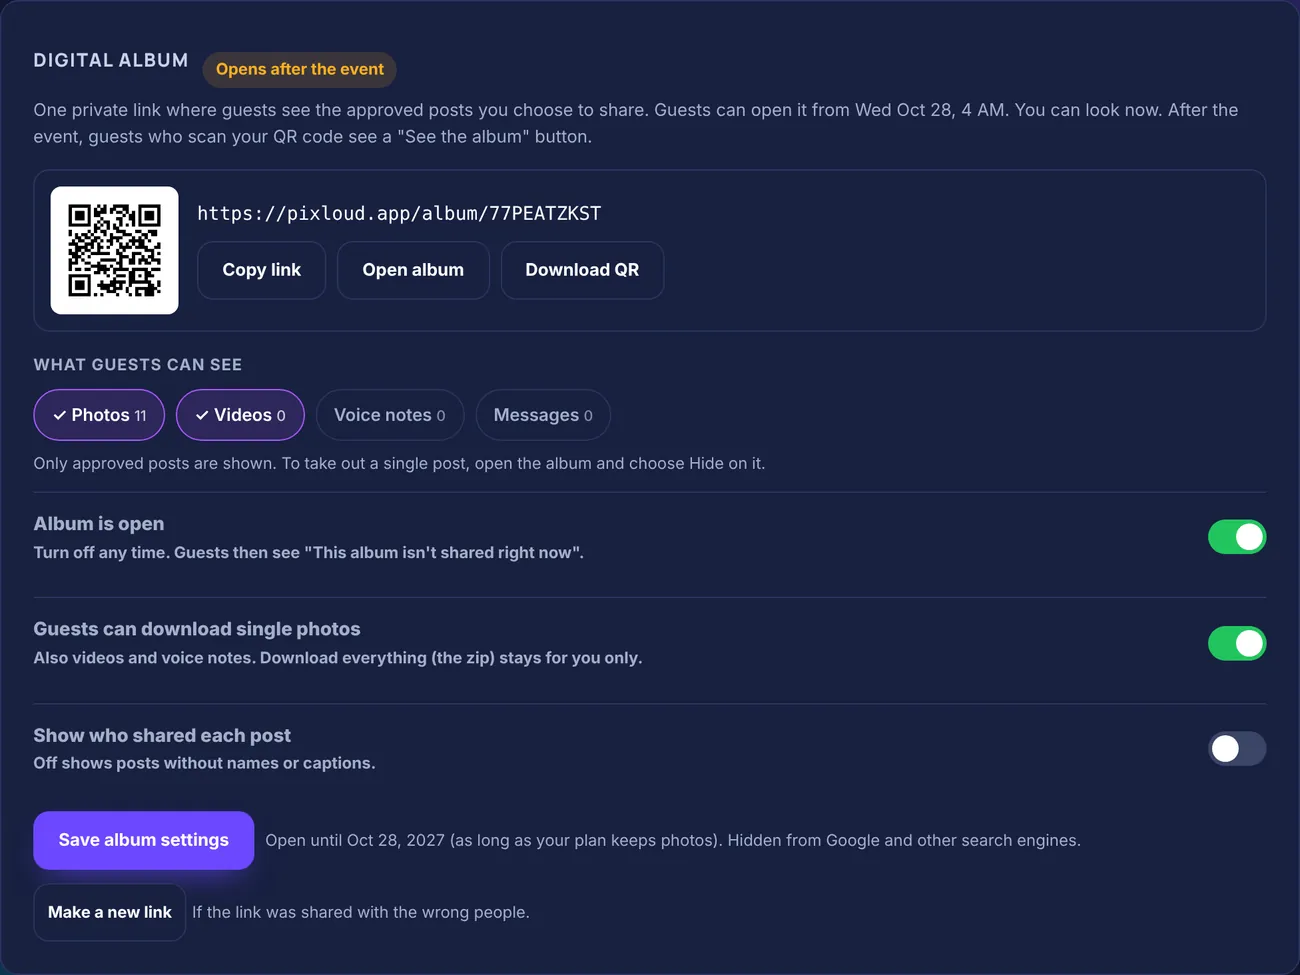
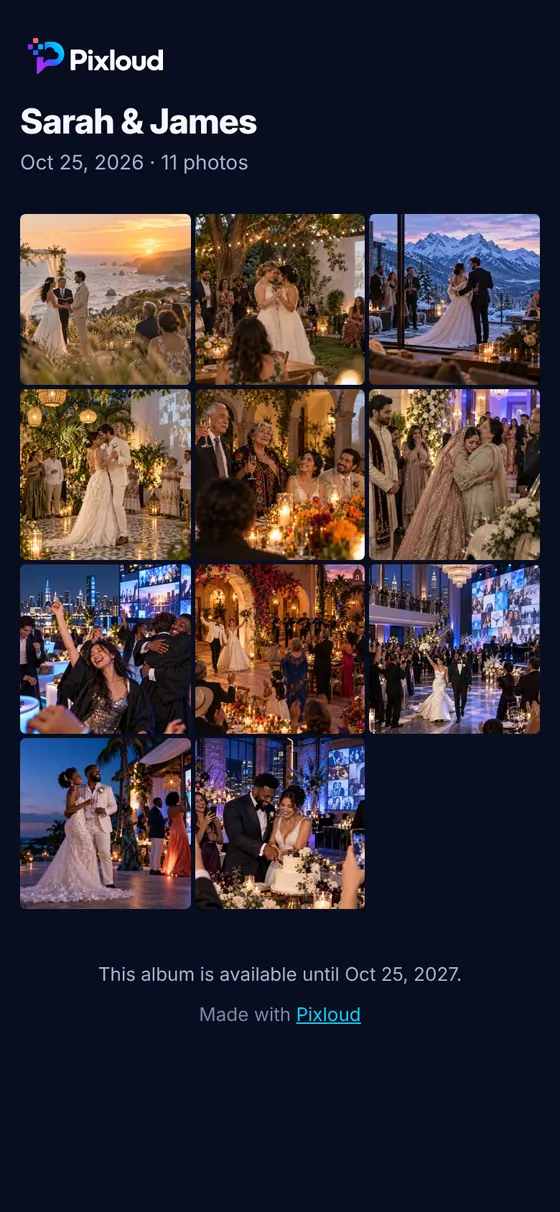
Every approved photo, video and voice note goes into one private album. On the Afterwards tab, copy the album link or download its QR code to send to guests. Download everything gives you one zip with all of it, sorted into folders, plus guests' messages as a spreadsheet.
TipPut the album link in your thank-you message. It usually brings in a few last photos too.
TipWant the album online for longer? You can keep it 1 more year ($19) or 3 more years ($39), paid once.

Questions people ask
How long does it take to set up a live photo wall?
About 15 minutes before the event (account, event, wall style, QR cards and helpers) and about 5 minutes at the venue to connect the screen and send a test photo.
What do I need at the venue?
A screen with a web browser (smart TV, projector computer, LED wall or laptop) and Wi-Fi or mobile data. Guests only need their own phones.
Can I try it before paying?
Yes. Your first 25 photos are free, with no card needed, so you can run the whole setup at home first.
What if the TV has no web browser?
Use the Pixloud app on Amazon Fire TV, cast a Chrome tab from a laptop, or connect a laptop to the TV with an HDMI cable.
Ready to try it?
Your first 25 photos are free, with no card needed. Follow these steps at home, send yourself a photo, and see it on your own TV.